Search This Blog

Wednesday, July 22, 2009

MattRach

Now this guy is awesome, stumbled onto him on youtube…. He has a load of different videos including a live jimi hedrix session at the hard rock cafe, which is amazing. Check him out below (its my favourite video, I think he was 15 (2007!) and at his website and youtube channel.

MATTRACH

Youtube channel -http://www.youtube.com/user/mattrach

Myspace - http://www.myspace.com/mattrachguitar

Website - http://mattrach.com/


Share/Bookmark

Tuesday, July 21, 2009

Part 5 – CentOS setting up VNC server

Setting up VNC Server, including firewall configuration.

If you followed my previous posting (Parts 1 –3) you would have selected the options Server and Server GUI in the CentOS installation wizard. In doing this you would have installed VNC server. VNC server provides a remote desktop capability for the server. Although it is installed we need to configure some elements before we can connect to it. I will assume you have read part 3 SSH, I will assume you can connect using putty and SSH as the root user.

To get VNC server up and running the way I want (replicate a desktop environment remotely) we need to do 3 things

  1. setup vncserver
  2. edit the firewall to allow vnc connections.

edit config file /etc/sysconfig/vncservers

The vncserver configuration file is located in the /etc/sysconfig directory. From the SSH terminal session run our favourite editor vi, (see part 2, section proxy environment variables, for more details on the editor and commands), to edit the vncservers file

vi /etc/sysconfig/vncservers

Once inside this file find the following two lines

# VNCSERVERS="2:myusername"
# VNCSERVERARGS[2]="-geometry 800x600 -nolisten tcp -nohttpd -localhost"

Uncomment these lines (remove the #), now we want to change the myusername to the username of the user you want to allow to have access to vnc. In this case I will use root and change the two lines to.

VNCSERVERS="2:root"
VNCSERVERARGS[2]="-geometry 800x600 -depth 16"

So lets look at these two lines, the first line sets up the user (in this case root) and the second line defines the resolution of the desktop (800x600) and the color depth (16bit). The 2: that appears referencing the user apart from referencing the user the number is helps dictate what tcp port the VNC server listens on. VNC server listens on 5900 + the user user number (each user has a port defined), so in our case the port will be 5902 (5900 + 2).

Note:

If you want to set up multiple users you can do that as follows. be aware that the root user will be port 5901 and linuxuser on 5902.

VNCSERVERS="1:root 2:linuxuser"
VNCSERVERARGS[1]="-geometry 1280x960 -depth 16"
VNCSERVERARGS[2]="-geometry 1024x768 -depth 16"

Once you have finished editing your file save and quit vi :wq.

create / edit xstartup scripts and set vncpassword

We now have to assign a password to each vnc session and configure the xstartup scripts for each user.

Login with each user assigned in the vncservers file. Once logged in, run the vncpasswd program and set the password. Below I show a screenshot of my terminal session logged in as root and running the vncpasswd program.

 imageIn addition to setting the password, the vncpasswd program creates a .vnc folder in the users home folder

~/.vnc/ 

Once all users have had their passwords assigned we need to create the xstartupfile in each .vnc folder. We do this by logging in as root and restarting the vncserver service.

service vncserver stop
service vncserver start

Now at this stage we should be able to connect to the vncserver (apart from the firewall config), however if you could connect at this time you will notice that the desktop is very basic and does not show the Gnome desktop. The interface you would see is the basic windows handler called X11. You should be able to do most things from here but thats not what i was after, I wanted a Gnome desktop. So there is 1 thing left to do.

Now earlier we created the xstartup scripts but did nothing with them. We need to edit these files.

vi ~/.vnc/xstartup

uncomment the following two lines (remove the #).

# unset SESSION_MANAGER
# exec /etc/X11/xinit/xinitrc

Save and quit the file, remember to do this for each user.

Restart the vncserver

service vncserver stop
service vncserver start

Ok, we should be good to go in so far as vnc is concerned however we still need to configure the firewall, this is detailed further below. 

edit the firewall to allow vnc connections.

Connected via SSH login as root and edit the following file

/etc/sysconfig/iptables

This file contains the setup for the firewall. We are going to add one line to this file. find the following line

-A RH-Firewall-1-INPUT -j REJECT --reject-with icmp-host-prohibited

and insert the following line above it.

-A RH-Firewall-1-INPUT -m state --state NEW -m tcp -p tcp --dport 5901:5902 -j ACCEPT

the last line in the firewall list should always be the REJECT rule, this is to ensure that if nothing matches a rule in the listing that it will always be rejected.

That should now be it. We need to reboot the server so type

shutdown -r now

(this will reboot the server immediately).

Once you have rebooted the server, fire up your vnc client (viewer) and try and connect to the server. I show a screenshot of the Ultra VNC viewer (on the windows machine)  I use to connect to the servers.

image

Other parts in this series

Share/Bookmark

Part 4 – CentOS SSH – Secure Shelling

SSH – Secure Shelling

Now being a windows guy my method of remoting to another machine was RDPing to it. This gave me a machine desktop on a remote machine. I wanted something similar for CentOS, I found VNC however in finding that I also found SSH. So before delving into how to configure VNC, I want to go into SSH a little. Then in my VNC part of the series I will use SSH to configure VNC.

So what is SSH, SSH is similar to telnet however SSH is encrypted where as telnet is not. By default SSH is installed and is running on the CentOS box. If you followed my previous postings on installation then this should be the case. SSH on CentOS is looked after by a daemon called sshd.

So what do we need to connect via SSH to the CentOS box. I connect from a windows machine so found a client called Puttytray (http://haanstra.eu/putty/). It is based on a client called Putty. There is no install it is just an executable.

Run up the client.

image

SSH usually runs over port 22. Enter the machine IP you want to connect to, ensure connection type is SSH. Now you can also type in a session name and save it, this will allow you to quickly connect in the future. In the screenshot above I have saved 3 sessions for connecting to 3 different CentOS machines.

Note: when you  first connect to a machine you will be prompted like below, this is a warning just telling you that the servers certificate is not in your cache (this is the same as the windows trusted cache). I click yes here, as i don’t want to be prompted each time I connect to the machine.

image

image

Once past the certificate warning you should be shown the above window, prompting for a logon name for this example lets use root.

image

Once you have entered the user and password, you should be presented with a command prompt. This should look like the prompt we saw in the previous part of this series. It has placed you in the users home directory (~, this is actually the physical folder /home/<username>). The # indicates you are logged in as root, a normal user is presented with a $.

That is pretty much it, what we have now is a remote command line terminal. So in the next part I will use this remote SSH connection to configure VNC.

Other parts in this series

Share/Bookmark

Named Anchors in Windows Live Writer (using plug-in)

This post will show how to use a plug-in (DynamicTemplate) to add functionality to the WYSIWYG interface in Windows Live Writer (WLW).

This functionality is not built into WLW, I was helpfully pointed at a plug-in for WLW. The plug-in is called DynamicTemplate.

http://www.joecheng.com/code/DynamicTemplate/

and from my initial looks at it it seems pretty powerful to me. I downloaded it and installed (the install in windows was straight forward, so I won’t cover that). Once installed fire up WLW and you should see in the Insert menu a new option labelled Template.

image

I have used a blog posting of mine as an example, and shown how to create a template with the plug-in for inserting named anchors. The template I have created when selected will prompt for the name you want to call the anchor.

Please view the video below for a run through.

Notes before watching the video are

_selection : is a special variable for DynamicTemplate and will insert whatever is selected in WLW into the template. In the example video I have no selection, but I include it in the template code so you can wrap the named anchor around some existing object in your post (if for some strange reason you want to do that :o) ).


Share/Bookmark

Monday, July 20, 2009

Part 3 - CentOS Proxy Configuration

CentOS Proxy Configuration

It took me a while to figure this out, being used to Windows and having IE generally used as a central repository for proxy settings, I was looking for something similar in CentOS. I am afraid in this case, as far as I can make out, proxy settings are mostly application specific. That said I believe there are locations that are apparently meant to be used for central proxy configuration and programs should try to get the proxy info from them. The central locations are split between GUI programs and command line programs.

So in this post I show how to configure the proxy settings in 4 locations, 2 of which are “apparently” central locations for other programs to use and the other 2 are program specific (as they seem to ignore the central settings). The 4 locations are

  1. Gnome Proxy (used by GUI programs)
  2. Proxy Environment Variables (used by command line programs)
  3. YUM (Software updater and installer)
  4. Firefox (Web browser)
Gnome Proxy setting

The Gnome desktop interface provides proxy configuration settings and apparently a lot of GUI programs will use this settings. This said, I am afraid these settings need to be changed for each user. (I can’t remember where I cam across this information and if it wrong maybe someone can let me know and I will update this.)

Gnome-Desktop proxy settings can be changed from a GUI tool or you can edit the file directly. The image below shows where to find the GUI tool under

System –> Preferences –> Network Proxy

image You can edit the proxy settings here. I have a proxy configuration file available so I have set the automatic proxy config setting, however you can set the proxy manually here as well. The advanced tab allows you to specifically define addresses to ignore the proxy for (i.e. the local subnet).

imageWhen using this GUI tool Gnome stores the proxy config settings in the following folders and files. ~ indicates the users home directory and the . hides the folder or file(see notes below for further explanation)

~/.gconf/system/proxy/%gconf.xml (used for the manual and advanced settings)
~/.gconf/system/http_proxy/%gconf.xml (used for the automatic settings)

I can’t tell you why it is split into two files but it appears to be so.

Proxy Environment Variables

Like the Gnome proxy settings above, the Environment variables are apparently for Command Line programs to provide a central area that these programs can look to for proxy config.

There are a number of proxy environment variables but I will concentrate on just 3 that apply to my network setup. These are

  1. http_proxy
  2. https_proxy
  3. ftp_proxy

I think these are pretty self explanatory.

To set these there is no GUI (that I am aware of), so we have to go to the command line. We need to fire up Terminal this is found in

Applications–> Accessories –> Terminal

image

The terminal should start in the users home folder ~ (see notes), you should see a prompt like this

[<username>@<machine_name> ~]#

or 

[<username>@<machine_name> ~]$

<username> should be the logged on user
<machine_name> should be the computer name you are on.
The # or the $ is dependent on whether you are logged in as a user or root. # indicates root, $ indicates normal user.

We can set the environment variables at the command prompt by typing

http_proxy=”http://<proxyserver>:<proxyport>”

Now the same applies to the other environment variables. However at the moment these environment variables are only valid within this particular Terminal session. If we were to fire up another program or terminal session theses environment variables would not exist in their scope. So to make the environment variables global we need to export them, this is done using the export command. We can export any number of variables by separating them with a space.

export http_proxy https_proxy ftp_proxy

Another issue here is that this is not a permanent change, if we reboot these variables will be lost. So to get around that we need to change a log on script called profile. The script is found here

/etc/profile

OK, so how do we edit a file? I am going to give a brief introduction to vi (mainly because I have only just got my head into it) and some basic bash commands.

So in the terminal window change directory to /etc/.

To get to this directory use the following bash commands

CD / (will take you to the root directory)

CD etc (will take you into the /etc directory)

Now we are in this folder, we can use the following command to list the contents..

ls

In the list of files and folders you should see the file profile listed.

OK now type

vi profile

This puts us into the vi editor, a command line text editor. Now I found this a bit weird a first but I am gradually getting the hang of it. The editor opens up in a mode called command mode. It will allow you to scroll up and down, but not allow you to modify text. This is where you have to change modes, in this case we want to go to insert mode. This can be achieved by hitting the escape key and then i or a

<esc> a/i

You should see at the bottom of the terminal window that – INSERT – appears, to indicate you are in INSERT mode. You can now modify the file. To quit out of this mode hit <esc> at anytime (—INSERT –) should disappear from the bottom of the terminal window.

OK so now we need to enter some the commands to set the variables. So somewhere in the profile file enter the following.

http_proxy=http://<proxyserver>:<proxyport>
https_proxy=$http_proxy
ftp_proxy=$http_proxy

export http_proxy https_proxy ftp_proxy

In my case the same proxy handles http, https and ftp. My script therefore sets the http_proxy variable and then sets the others to the http_proxy value. If you have different settings for https and ftp get rid of the $http_proxy and replace with the direct setting (as with the http_proxy above). Once these have been set I then export the variables to make them global.

OK so we need to save the file by issuing the write command. Hit escape and enter :w <enter>

<esc> :w <enter>

The bottom line should change to show something like

"profile" 60L, 1062C written

Now we have saved the file, we need to quit the editor. The quit command is

<esc> :q <enter>

While using the editor you may find you want to quit without saving, although you have made changes. Now if you just issue the command above it will complain that there are unsaved changes. so to quit without saving changes you can force it by typing

<esc> :q! <enter>

In addition you can combine commands, so to quit and save type

<esc> :wq <enter>

You should now reboot.

You can test that the changes have worked by firing up the terminal (as above) and typing the following command

echo $http_proxy

You should get the value you set in the profile file. The same applies to the other variables if you want to check them.

YUM - Software Updater and Add/remove Software - Proxy Setting

There are two locations within CentOS GUI to run software update tools (software updates and software installations). These are

  • Applications –> System Tools –> Software Updater
  • Applications –> Add/Remove Software

image  image

They both run the same underlying command line application YUM (Yellowdog Updater, Modified) but the Software updater allows for installed software (packages) to be updated, where as the Add/Remove Software option will allow you to add and remove software (packages) from defined repositories. (Repositories are locations on the web/network that software packages can be downloaded/updated from, CentOS comes with a set of predefined repositories but you can add custom repositories when needed).

Now the proxy setting for YUM cannot be configured within any of the GUIs, it has to be done within the configuration files. I will quickly go through this, but it will involve using the vi editor, I will not explain the commands here please see the previous section on environment variables for more details on the each command.

The YUM configuration is yum.conf and is found in /etc/

/etc/yum.conf

Enter the vi editor

vi /etc/yum.conf

enter insert mode

<esc> i

find the line that says proxy= and change it to your proxy server settings, if your file does not contain this setting just add it in the first clear line in the [main] section.

proxy=http://<proxyserver>:<proxyport>

Quit and save vi.

<esc> :wq

Now fire up either the Software updater or the Add/Remove Software. You should find that both tools are able to connect to the defined repositories. you can install any updates you require.

Firefox – Proxy Settings

Now I talked about GUI programs respecting the Gnome proxy settings and I believe Firefox does. I really only include this here as a FYI (I messed with the settings when I was trying to work out what was going on with all the proxies). It appears that the default for the proxy settings in Firefox is to “Use System Proxy settings” which means it looks for the Gnome settings. So if you make the changes above you should not have to worry about this.

image

Open up Firefox and select preferences

Edit –> Preferences

image

In the advanced section, under the network tab, click settings

image

image

Once in Connection settings you can change the your proxy settings.

Notes

  1. The folder ~ is actually a shortcut referring to the logged on users home folder (you can see why the setting must be configured for each user). The physical user home folder can be located here /home/<username>.
  2. The . on the beginning of the file or folder name is a way to hide the file or folder from normal folder browsing.
Other parts in this series

Share/Bookmark

Advertise on the moon?

Not sure if this is real but it is a little worrying, don’t want my moon spoiled with some Coca cola,Pepsi,Google…etc.. logo thanks. Although my name on it might be good… ;o)

http://www.moonpublicity.com/


Share/Bookmark

Sunday, July 19, 2009

Part 2 – CentOS initial configuration
After the initial installation has completed there are some small configuration settings the installation wizard takes you through.

image Click Forward.

image The Firewall page allows you to some basic rules quickly to the CentOS firewall (also known as iptables). Select the rules you want to allow in the drop down. As I want to use windows networking I have selected Samba here (samba is the Linux component that enables Linux to participate in a windows network. You also want to allow SSH, as we will use SSH to connect remotely to the Linux box.

image

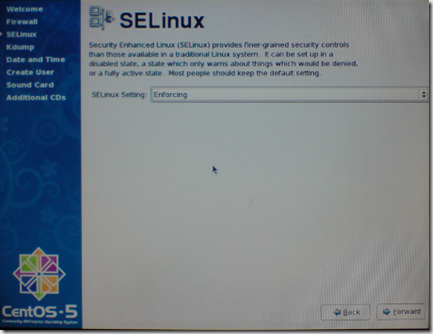
The text on the SElinux page explains what this does, I have left it as Enforcing. I believe this is recommended unless you really know that you have to disable it. By leaving it as Enforcing I have not encountered any problems caused by this. It worth remembering this is on along with the firewall incase you need to do any troubleshooting with, you can at least disable these to isolate/rule out these components as the cause of problems.

image

I never engaged this but my guess is its similar to good ole Dr Watson.

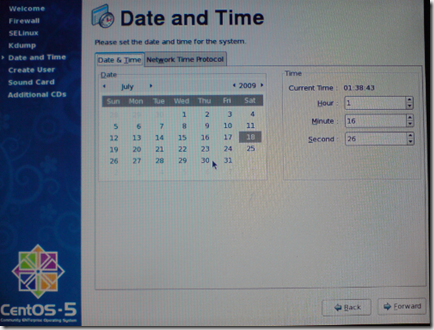
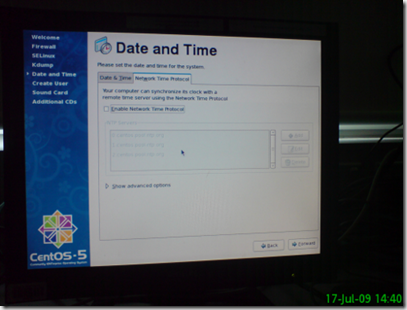
imageDate and Time page pretty much self explanatory, set it. Ensure you get this as near as you can to the windows server times. Now if you have an internal NTP server you could set it to use this service to set the date and time. I had issues with this so I disalbed the NTP and set the time manually. I might come back and get this working as Windows networking (authentication) can start having issues if the times are out by more than 5 minutes.

image

image
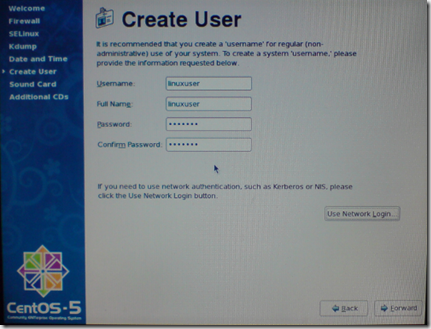
The create user page allows you create a standard user for use on your linux machine. This user will be a local standard linux user.

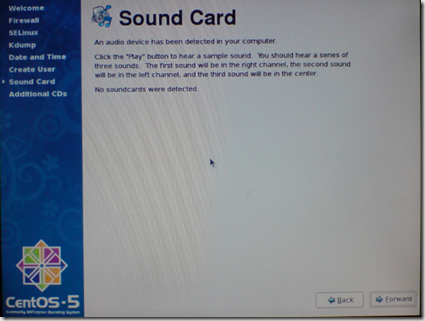
image I had no desire for sound in my machine so I didnot test this and Clicked “Forward”.

image
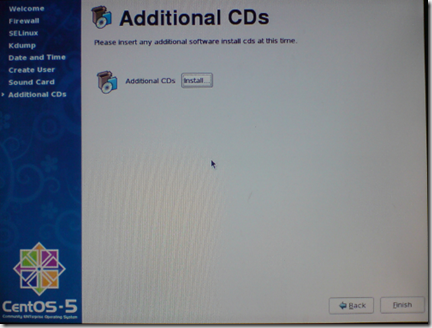
I skipped this screen

image
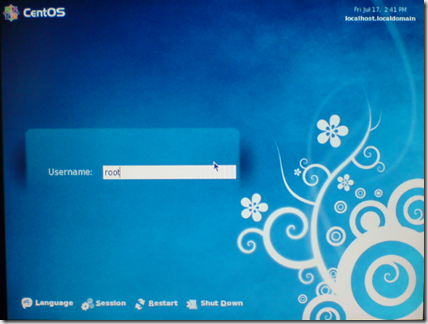
OK, initial installation and configuration has been completed. Type in root (remember this is the super user account in the linux world). Enter the root password..

image
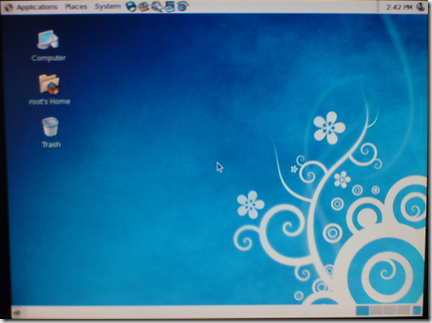
You should be presented with the CentOS desktop.

Other parts in this series

Share/Bookmark

Thursday, July 16, 2009

Part 1 – CentOS basic install.

Introduction

As i have already said I am a Windows Guy and this is my first serious foray into Linux. I make no apology for the basic nature of this walkthrough or the inaccuracies in it. I just hope it allows someone to easily get started with Linux, while explaining what is going on (to the best of my knowledge), without having to go searching the net for various information.

So after having to have setup a Linux (CentOS) machines for my employer and failing to find a decent all in one tutorial from a windows perspective, (not to say I haven’t found any good articles, I have and I list these in the last section of this series of posts). I thought I would try and provide a simple walkthrough of how to setup CentOS. This install is a completely fresh install and will wipe anything on the disk, no dual booting etc…

Linux (CentOS) – Basic Install

Setting the scene: The machines I am using for this are old Compaq DL380 G1s, with 3 x 9GB drives in a Raid 5 config. I had create one logical drive.

OK lets get started, I am assuming you have got yourself either the CentOS 6 CD installation set or the DVD.

Boot the machine from the CentOS Disc.

image Press Enter to install in graphical mode.

imageHere you can test the CD media or skip the Test. (I had done installs already from this media so I skipped this, plus I had old hardware and this can take a while).

image Click Next.

image Select your language.

image Select your keyboard layout.

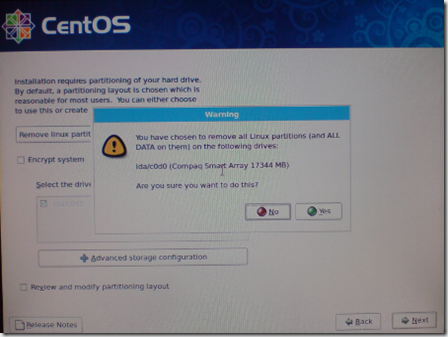
image  Ok this screen I got because the disk I had was completely blank as I had just created the raid area and logical drive. This is only a warning message that data is going to be overwritten, I had nothing on the drive so I clicked Yes.

image I was performing a complete fresh install so I left everything on this screen as is. Click Next.

image Another warning message about overwriting data, Click Yes.

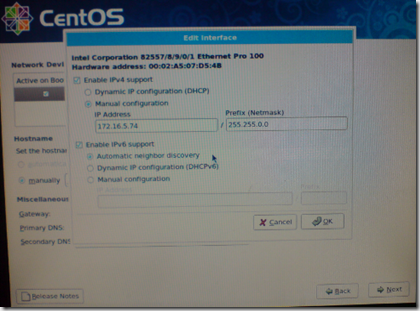
imageOk in my situation I needed to manually setup my IP addresses. Click Edit button to manually change IP configuration.

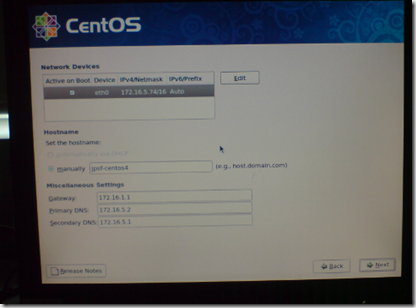
image Here, after manually editing the network device eth0, I have added the gateway and DNS settings. A point to mentioned here is that I sit behind a proxy server, we will come back to this later as the gnome (desktop manager), yum (software repositiory) and web browser will all need to be configured to work with the proxy. So if you sit behind a proxy don’t expect by setting up your IP info here that the Linux install will connect to the tinterweb.

image

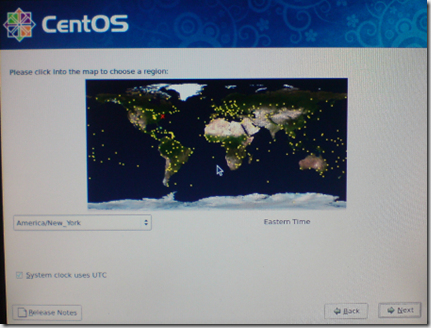
Select your location, either from the drop down or you can select it on the map.

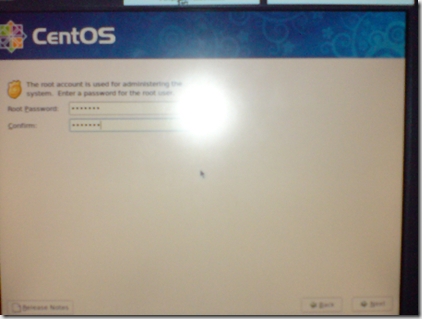
image OK, the root user in Linux is equivalent to the Administrator account in windows. Now I know the practice in Windows is to rename your Administrator account to a less obvious name. I don’t know if the same can be said for the root account in Linux? Anyway just be aware this user is GOD and can do everything, so should be treated with care, and the password complexity should be equivalent to  its status.

image

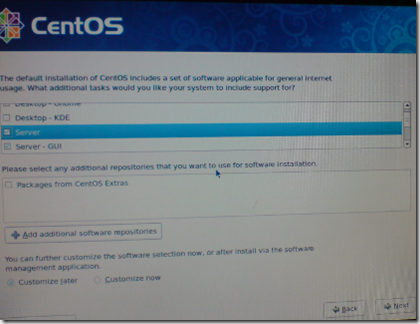
Ok here you can select what you want to be installed, grouped together into categories, during the initial installation, you can always install features later, after CentOS is installed. I choose to install the Desktop – Gnome, Server components and the Server – GUI (adds GUI interfaces to the server components) components (being a windows guy ;o) ).
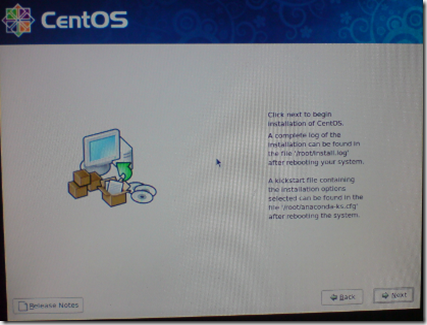
I did not choose the Packages from CentOS, the reason being that this will not update until the proxy is configured and I could not do this during the install wizard. I did try this on the first install I did and it took ages to time out, so if you have a proxy don’t select this option.image OK, we are ready to install, click Next.

image

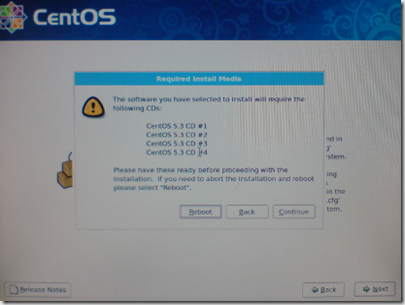
This screen is a warning insuring you have all of your CDs prepared, there are actually 6 CDs in the complete set and I believe it just tells you here what exactly you need, depending on the installation selections you have made ( I only need the first 4 CDs).

image

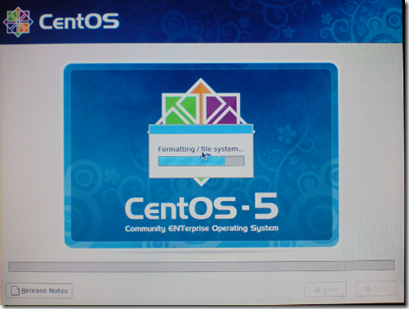
The installation begins, with the setup of the hard disk and then software installation.

Go to part 2

Other parts in this series

Share/Bookmark

Introduction - Integrate CentOS5 and Windows AD Domain

At work I had been tasked with setting up a few Linux servers, these servers are to replace existing Windows boxing running a clustered application. The application will happily run on Linux. My background is Microsoft (heavily Microsoft) so this task was well outside my comfort zone.

I had setup a Windows Active Directory Domain to control my existing infrastructure, and I did not want to add to my workload by having these isolated Linux machines running there own authentication mechanisms. So after a quick Google it seemed that integration between the Linux boxes and the windows domain was possible. Armed with information off I went….

I am using CentOS for a few reasons.

  1. I have access to an experienced CentOS guy.
  2. CentOS is derived from Red Hat (so I saw benefit in learning something that would enhance my corporate CV).
  3. CentOS is free (but enterprise level due to Red Hat background)

I am going to split this article into certain sections as there were some additional requirements for me that are outside of the initial Windows integration. Mainly this was some form of remote desktop (coming from a windows background this again is mainly to do with a comfort factor :o), the command line scares me ;o) ) and to keep the system as secure as I could.

Other parts in this series

Share/Bookmark

Tuesday, July 14, 2009

Ridiculous IT moments in Film (or knowledge is not always a good thing) – Top Ten

I love a good count down, and this count down on apc certainly appeals to my nerd/geek side.

The problem (watching films with tech) all comes down to knowing too much, I yearn for the days I was stupid…. <Yes insert your witticisms here> and I could enjoy a film in ignorant bliss.

To reaffirm this point, I have recently started working with IT in a laboratory environment with Mass Spec machines. Now I used to love a good cop show but now I am reduced to eye rolling immediately the lab tech starts the Mass Spec analysis… lol.

http://apcmag.com/top-10-worst-movie-tech-moments.htm


Share/Bookmark

Ashes 2009 First Test: And they say the Poms are whingers

Engage soapbox….

OK so the first test has come to an end, if not a farcical end. Ricky Ponting is moaning/whinging about the fact England delayed the end of the game to eek out the draw. Personally I don’t see it, in any other sport if the clock is ticking down and the team/competitor is under pressure they will time waste, its just part and parcel of sports (substitutes, possession/defensive tactics, injuries, taking time over infringement penalties, etc..). They (the competitors) are out there to get a result be it a win or a draw, you just don’t want to come off a loser.

And my other point about this, is that a test match is played over 5 days, yes 5 days, if you can’t get the win in that time you cannot bemoan the last few minutes of time wasting. Get the job done in the allowed time.

Disengage…


Share/Bookmark

Remove Shake from Home Video

Came across this new software being developed by University of Wisconsin, Madison, and software giant Adobe. The software removes the hand shake from home movies creating a professional looking tracking shot.

Looks really impressive, if it does what it says on the tin…. Video below and a link to the full article is below that.

http://www.newscientist.com/article/dn17456-shaky-home-movies-get-a-big-budget-feel.html


Share/Bookmark

Monday, July 13, 2009

HP C7280 All in One install on Windows 7 RC1

I initially had problems installing this, I received an error message after trying to run the setup that it was incompatible for this version of windows and then would exit.

I have now sorted this issue, and it was pretty straight forward, it involves two settings.

Find the setup executable on the installation CD. Right click this file and select Properties. Once in the Properties dialog, choose the Compatibility Tab. On this tab, in the “Compatibility Mode” grouping tick the
“Run this program in compatibility mode for:”

and then in the drop down menu select

“Windows Vista”

image

Now done the bottom of the bottom of the Compatibility Tab in the Privilege Level grouping tick the

“Run this program as an administrator”

image

Now click the “OK” button.

Now when the executable is run it should run in Vista Compatibility Mode and as an administrator. The warning message should no disappear.

There is one problem I have come across, and that is in the scanning menus. The layout of the menus are not formatted properly, and it appears that options are stacked on top of one another so you are unable to change any of the options. That said you can still scan, just cannot change any settings.


Share/Bookmark

Morgan Stanley Report (full report) on Teenager Media usage by 15 Year old.

Reading one of my technology sites I came across this report which is apparently steaming around the tinterweb. I include the report here, I found it a good interesting read.

How Teenagers Consume Media

Radio
Most teenagers nowadays are not regular listeners to radio. They may occasionally tune in, but they do not try to listen to a program specifically. The main reason teenagers listen to the radio is for music, but now with online sites streaming music for free they do not bother, as services such as last.fm do this advert free, and users can choose the songs they want instead of listening to what the radio presenter/DJ chooses.

Television
Most teenagers watch television, but usually there are points in the year where they watch more than average. This is due to programs coming on in seasons, so they will watch a particular show at a certain time for a number of weeks (as long as it lasts) but then they may watch no television for weeks after the program has ended.
Teenage boys (generally) watch more TV when it is the football season, often watching two games and related shows a week(totalling about 5 hours of viewing). A portion of teenagers watches programs that are regular (such as soap operas) at least five times a week for half an hour or so but this portion is shrinking, as it is hard to find the time each day.
Teenagers are also watching less television because of services such as BBC iPlayer, which allows them to watch shows when they want. Whilst watching TV, adverts come on quite regularly (18 minutes of every hour) and teenagers do not want to watch these, so they switch to another channel, or do something else whilst the adverts run.
The majority of teenagers I speak to have Virgin Media as their provider, citing lower costs but similar content of Sky. A fraction of teenagers have Freeview but these people are light users of TV (they watch about 1 ½ hours per week) so they do not require the hundreds of channels that other providers offer.

Newspapers
No teenager that I know of regularly reads a newspaper, as most do not have the time and cannot be bothered to read pages and pages of text while they could watch the news summarised on the internet or on TV. The only newspapers that are read are tabloids and freesheets (Metro, London Lite…) mainly because of cost; teenagers are very reluctant to pay for a newspaper (hence the popularity of freesheets such as the Metro).
Over the last few weeks, the sun has decreased in cost to 20p, so I have seen more and more copies read by teenagers. Another reason why mainly tabloids are read is that their compact size allows them to be read easily, on a bus or train. This is especially true for The Metro, as it is distributed on buses and trains.

Gaming
Whilst the stereotypical view of gamers is teenage boys, the emergence of the Wii onto the market has created a plethora of girl gamers and younger (6+) gamers. The most common console is the Wii, then the Xbox 360 followed by the PS3. Most teenagers with a games console tend to game not in short bursts, but in long stints (upwards of an hour).
As consoles are now able to connect to the internet, voice chat is possible between users, which has had an impact on phone usage; one can speak for free over the console and so a teenager would be unwilling to pay to use a phone. PC gaming has little or no place in the teenage market.
This may be because usually games are released across all platforms, and whilst one can be sure a game will play on a console PC games require expensive set ups to ensure a game will play smoothly. In addition, PC games are relatively easy to pirate and download for free, so many teenagers would do this rather than buy a game.
In contrast, it is near impossible to obtain a console game for free.

Internet
Every teenager has some access to the internet, be it at school or home. Home use is mainly used for fun (such as social networking) whilst school (or library) use is for work. Most teenagers are heavily active on a combination of social networking sites. Facebook is the most common, with nearly everyone with an internet connection registered and visiting >4 times a week. Facebook is popular as one can interact with friends on a wide scale.
On the other hand, teenagers do not use twitter. Most have signed up to the service, but then just leave it as they release that they are not going to update it (mostly because texting twitter uses up credit, and they would rather text friends with that credit). In addition, they realise that no one is viewing their profile, so their ‘tweets’ are pointless. Outside of social networking, the internet is used primarily as a source of information for a variety of topics.
For searching the web, Google is the dominant figure, simply because it is well known and easy to use. Some teenagers make purchases on the internet (on sites like eBay) but this is only used by a small percentage, as a credit card is required and most teenagers do not have credit cards. Many teenagers use YouTube to watch videos (usually anime which cannot be watched anywhere else) and some use it as a music player by having a video with the music they want to listen to playing in the background.

Directories
Teenagers never use real directories (hard copy catalogues such as yellow pages). This is because real directories contain listings for builders and florists, which are services that teenagers do not require. They also do not use services such as 118 118 because it is quite expensive and they can get the information for free on the internet, simply by typing it into Google.

Viral/Outdoor Marketing
Most teenagers enjoy and support viral marketing, as often it creates humorous and interesting content. Teenagers see adverts on websites (pop ups, banner ads) as extremely annoying and pointless, as they have never paid any attention to them and they are portrayed in such a negative light that no one follows them.
Outdoor advertising usually does not trigger a reaction in teenagers, but sometimes they will oppose it (the Benetton baby adverts). Most teenagers ignore conventional outside advertising (billboards etc) because they have seen outside adverts since they first stepped outside and usually it is not targeted at them (unless it’s for a film).
However, campaigns such as the GTA: IV characters painted on the side of buildings generate interest because they are different and cause people to stop and think about the advert, maybe leading to further research.

Music
Teenagers listen to a lot of music, mostly whilst doing something else (like travelling or using a computer). This makes it hard to get an idea of the proportion of their time that is spent listening to music. They are very reluctant to pay for it (most never having bought a CD) and a large majority (8/10) downloading it illegally from file sharing sites. Legal ways to get free music that teenagers use are to listen to the radio, watch music TV channels (not very popular, as these usually play music at certain times, which is not always when teenagers are watching) and use music streaming websites (as I mentioned previously).
Almost all teenagers like to have a ‘hard copy’ of the song (a file of the song that they can keep on their computer and use at will) so that they can transfer it to portable music players and share it with friends. How teenagers play their music while on the go varies, and usually dependent on wealth –with teenagers from higher income families using iPods and those from lower income families using mobile phones.
Some teenagers use both to listen to music, and there are always exceptions to the rule. A number of people use the music service iTunes (usually in conjunction with iPods) to acquire their music (legally) but again this is unpopular with many teenagers because of the ‘high price’ (79p per song).
Some teenagers use a combination of sources to obtain music, because sometimes the sound quality is better on streaming sites but they cannot use these sites whilst offline, so they would download a song then listen to it on music streaming sites (separate from the file).

Cinema
Teenagers visit the cinema quite often, regardless of what is on. Usually they will target a film first, and set out to see that, but sometimes they will just go and choose when they get there. This is because going to the cinema is not usually about the film, but the experience –and getting together with friends.
Teenagers visit the cinema more often when they are in the lower end of teendom (13 and 14) but as they approach 15 they go to the cinema a lot less. This is due to the pricing; at 15 they have to pay the adult price, which is often double the child price. Also, it is possible to buy a pirated DVD of the film at the time of release, and these cost much less than a cinema ticket so teenagers often choose this instead of going to the cinema.
Some teenagers choose to download the films off the internet, but this is not favourable as the films are usually bad quality,have to be watched on a small computer screen and there is a chance that they will be malicious files and install a virus.

Devices

Mobile Phones
99pc of teenagers have a mobile phone and most are quite capable phones. The general view is that Sony Ericsson phones are superior, due to their long list of features, built in walkman capability and value (£100 will buy a mid-high range model). Teenagers due to the risk of it getting lost do not own mobile phones over the £200 mark.
As a rule, teenagers have phones on pay as you go. This is because they cannot afford the monthly payments, and cannot commit to an 18-month contract. Usually, teenagers only use their phone for texting, calling. Features such as video messaging or video calling are not used –because they are expensive, (you can get four regular texts for the price of one video message).
Services such as instant messaging are used, but not by everyone. It usually depends whether the phone is Wi-Fi compatible, because otherwise it is very expensive to get internet off the phone network. As most teenagers’ phones have Bluetooth support, and Bluetooth is free, they utilise this feature often.
It is used to send songs and videos (even though it is illegal) and is another way teenagers gain songs for free. Teenagers never use the ringtone and picture selling services, which gained popularity in the early 00s. This is because of the negative press that these services have attracted (where the charge £20 a week with no easy way to cancel the service) and the fact that they can get pictures and music on a computer –then transfer it to their phones at no cost.
Mobile email is not used as teenagers have no need; they do not need to be connected to their inbox all the time as they don’t receive important emails. Teenagers do not use the internet features on their mobiles as it costs too much, and generally, if they waited an hour they could use their home internet and they are willing to wait as they don’t usually have anything urgent to do.
Teenagers do not upgrade their phone very often, with most upgrading every two years. They usually upgrade on their birthday when their parents will buy them a new phone, as they do not normally have enough money to do it themselves.

Televisions:
Most teenagers own a TV, with more and more upgrading to HD ready flat screens. However, many are not utilising this HD functionality, as HD channels are expensive extras which many families cannot justify the added expenditure. Many of them don’t want to sign up to HD broadcasting services, as adverts are shown on standard definition broadcasts, so they can’t see the difference. Most people have Virgin Media as a TV provider. Some have sky and some have Freeview but very few only have the first five channels (BBC One, BBC Two, ITV, Channel Four and Channel Five).

Computers:
Every teenager has access to a basic computer with internet, but most teenagers computers are systems capable of only everyday tasks. Nearly all teenagers’ computers have Microsoft office installed, as it allows them to do school work at home.Most (9/10) computers owned by teenagers are PCs, because they are much cheaper than Macs and school computers run Windows, so if a Mac is used at home compatibility issues arise.

Games Consoles:
Close to 1/3 of teenagers have a new (<2 ½ years old) games console, 50% having a Wii, 40% with an Xbox 360 and 10% with a PS3. The PS3 has such a low figure because of its high price (£300) and similar features and games to an Xbox 360, which costs less (£160). The Wii’s dominance is due to younger brothers and sisters, they have a Wii and parents are not willing to pay for another console.

What is Hot?
•Anything with a touch screen is desirable.
•Mobile phones with large capacities for music.
•Portable devices that can connect to the internet (iPhones)
•Really big tellies

What Is Not?
•Anything with wires
•Phones with black and white screens
•Clunky ‘brick’ phones
•Devices with less than ten-hour battery life


Share/Bookmark

Saturday, July 11, 2009

Thunderbird, “Send To/Mail Recipient” not working

Recently I went to try and send a picture to a friend by using the right click context menu.

image

On clicking the Mail recipient I got the dialog box offering if I wanted to resize the image for sending,

image 

but after selecting my choice I was met with the following message.

image

Now I followed the instruction to reset the defaults, however that made no difference. However I did find a solution and its a string value called DLLPath in the registry key

HKEY_LOCAL_MACHINE\SOFTWARE\Clients\Mail\Mozilla Thunderbird\

When I looked at this value in my registry it was blank. To fix I had to specify the path to the MAPI dll that comes with Thunderbird. The dll is called mozMapi32.dll and it is found (usually) in the root of the Thunderbird installation directory, in my case this was

C:\Program Files (x86)\Mozilla Thunderbird\

Once I had specified the full path to the DLL C:\Program Files (x86)\Mozilla Thunderbird\mozMapi32.dll in the DLLPath string value I was able to send via the right click context menu from Windows explorer.

Looking back I cannot say whether this was working before and stopped, or whether it just has not been working at all within Windows 7 and Thunderbird. It may just be this was the first time I had tried to use it since installing Windows 7 or it may have been an update to thunderbird.


Share/Bookmark

Thursday, July 09, 2009

Windows 7: Dual Booting and Thunderbird emails

When I first installed Windows 7 RC1 onto my computer I set it up as a dual boot, allowing me to go back and forth into my previous Vista install.

Please ensure you back up your profile folders before trying any of this, just incase something does go awry. I doubt very much if this is a supported configuration.. :o)

After using the new OS for a week or so, I found the only reason I was going back into the Vista OS was to check emails. My first thought was ok I will install Thunderbird in Windows 7 and then copy across my profile (Thunderbird) from vista to Windows 7. I thought about this and just thought what a pain as one profile would become out of date, or worse I would have mixture of emails in each profile.
So they got me thinking about Junctions, could I set up a Junction to my existing thunderbird profile location in Vista from the Windows 7 machine…..

Under windows 7 and vista your thunderbird profiles can usually be found here
%appdata%\Thunderbird\Profiles.

Let me give some more background to my setup. In my Vista installation I have moved my users folder from the system drive to another drive (for backup purposes so I can blitz the OS and retain my data). So currently the vista Thunderbird folders sit on my D: drive.
Now I installed Thunderbird into Windows 7, I let the install put the folders in the default location as above (%appdata%\Thunderbird\Profiles), so this was on my C: drive.

So now I went to newly installed thunderbird folder in windows 7 and deleted the profiles folder. Now you will need to get the full path to the existing Vista thunderbird profile folder (in my case the profile on the d drive). Now I opened up a command prompt in the same location and created a junction using the mklink command below (you will need to edit where necessary).

  • mklink /J profiles D:\<folders>\Thunderbird\profiles

Now if you look at this junction in Windows 7 (you may need to allow hidden/system folders to be viewed in Folder Options) you should see that the folder has a shortcut overlay arrow on it.

image

OK, one last thing I did was to copy the profile file, profile.ini, from the vista folder and place into the Thunderbird folder. All done, fire up Thunderbird on Windows 7 and all should be good.

I include a screenshot of the junction from the command prompt.

image


Share/Bookmark